Schedule Campaigns
You can define a schedule for running a campaign. Campaign schedules can be configured for single runs or for recurring frequency.
- On the Campaign Builder page, under Execute, click Schedule for Later.
- Click Select Date and Time. The Scheduler pop-up window appears.
- Under the Single tab, click
 to select the start date.
 - Under Time, click
 to select the time when you wish the campaign to start.
 - Under Time Zone the default time zone is displayed.
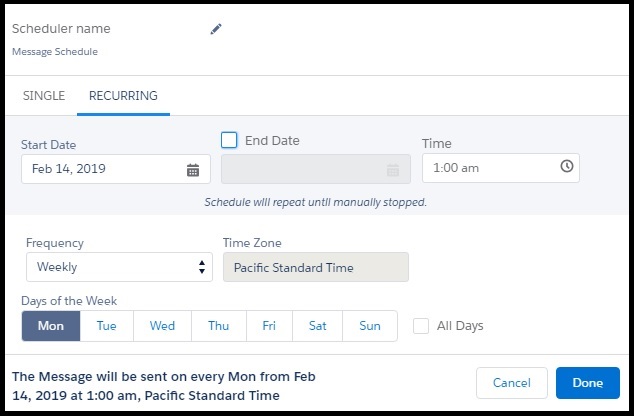
- Click the Recurring tab to configure a recurring campaign.
- Click to enter the start date.
- Select End Date to configure the date when you want the campaign to end.
- Under Time, click to configure the start time for the campaign.
- Under Frequency, select the schedule frequency. The available options are:
- Daily – Select the number of days after which you want the campaign to run.
- Weekly – Select the day of the week in which you want the campaign to run. You can also select All Days to run the campaign on all days of the week.
- Monthly – Select the Month and the day of the month when you want the campaign to repeat. You can also select All Months to run the campaign on the selected day of every month.
- Yearly – Select the number of years after which you want the campaign to repeat. When you select the yearly frequency, you also need to specify the day and the month in the year when you want the campaign to recur. You can also select All Months to run the campaign every month. For example, if Repeat Every = 1 year; Day = 2nd; Every Month checkbox = Selected then the campaign is scheduled to run on the second day of every month on every alternate year.
- Under Time Zone the default time zone is displayed.
- Click Done to set the schedule.
0 Comments