Register your SMS-Magic Converse Account
After you install SMS-Magic Converse App, register the application. It will set up the SMS magic account for your organization users or user groups. Select the right subscription plan as per your requirements. Then configure the remote site settings for the user’s Salesforce organization. Follow the steps below as shown.
Access SMS-Magic Converse
- Log in to Salesforce.
- To access the SMS-Magic Converse, do one of the following:
- For Salesforce Lightning users, click
 on the top left corner to access the App Launcher.
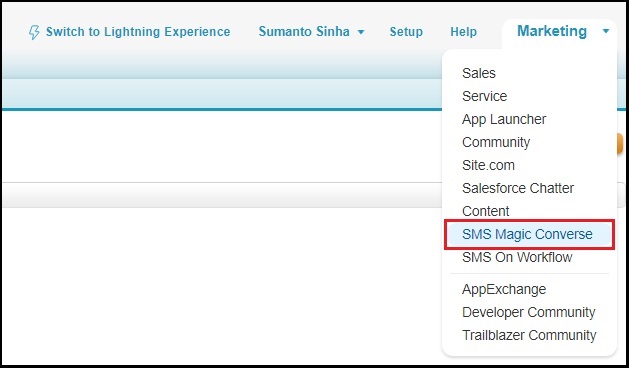
 - For Salesforce Classic user, click SMS-Magic Converse from the App menu on the top right corner of the Salesforce dashboard.
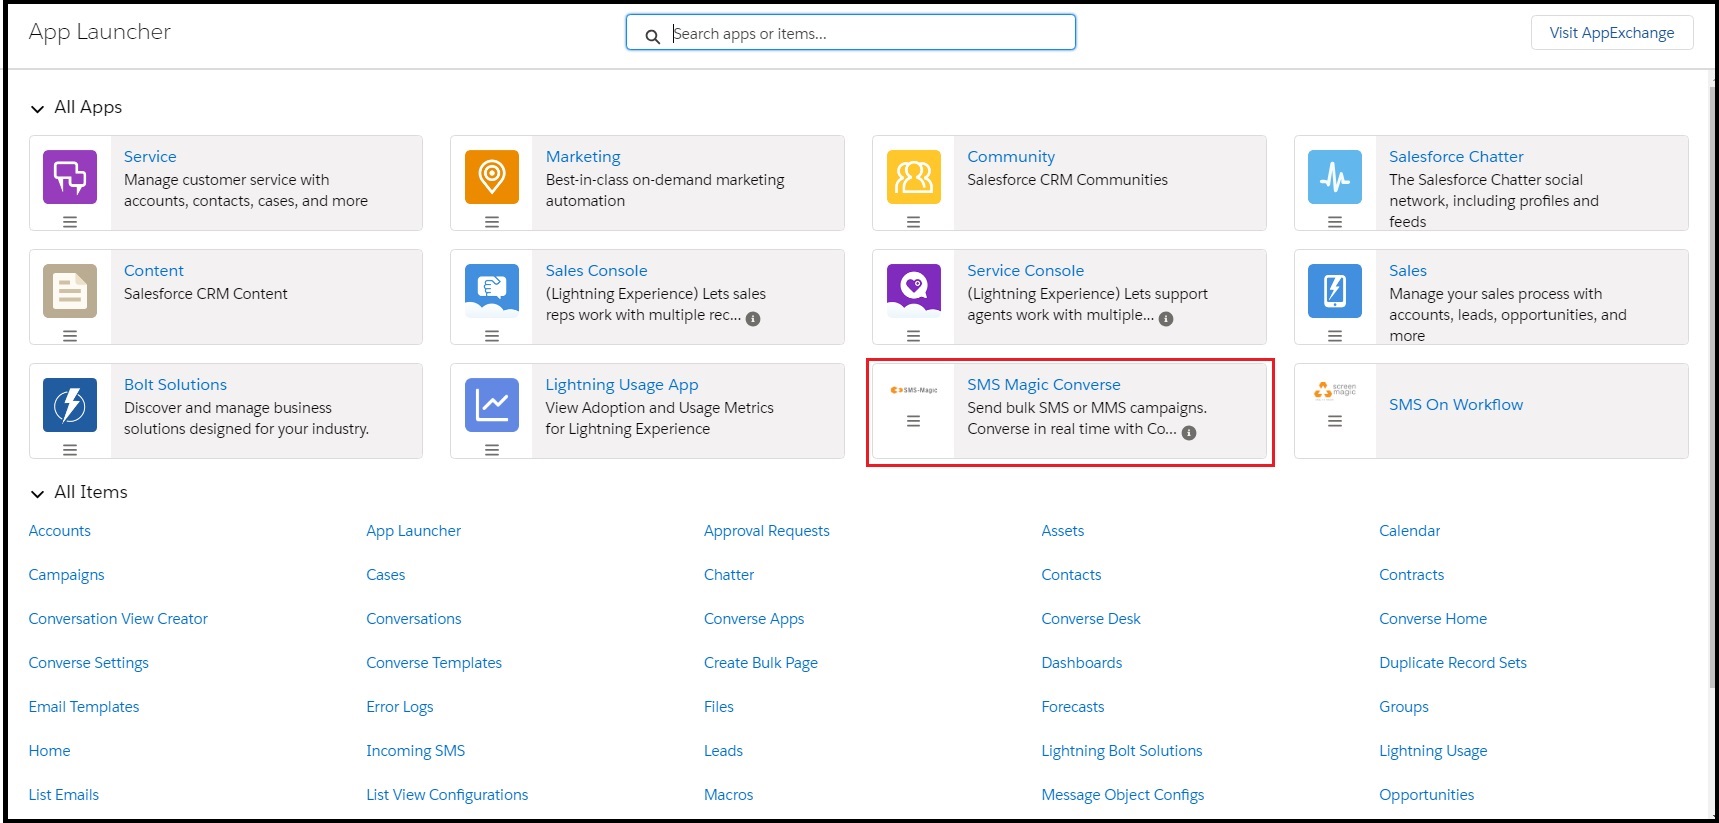
- For Salesforce Lightning users, click
- Alternatively, you can also click
 to access the Converse Settings page.
 - Select the SMS-Magic Converse. The SMS-Magic Converse Home page appears.
Register SMS-Magic Converse
- Log in to Salesforce and access SMS-Magic Converse.
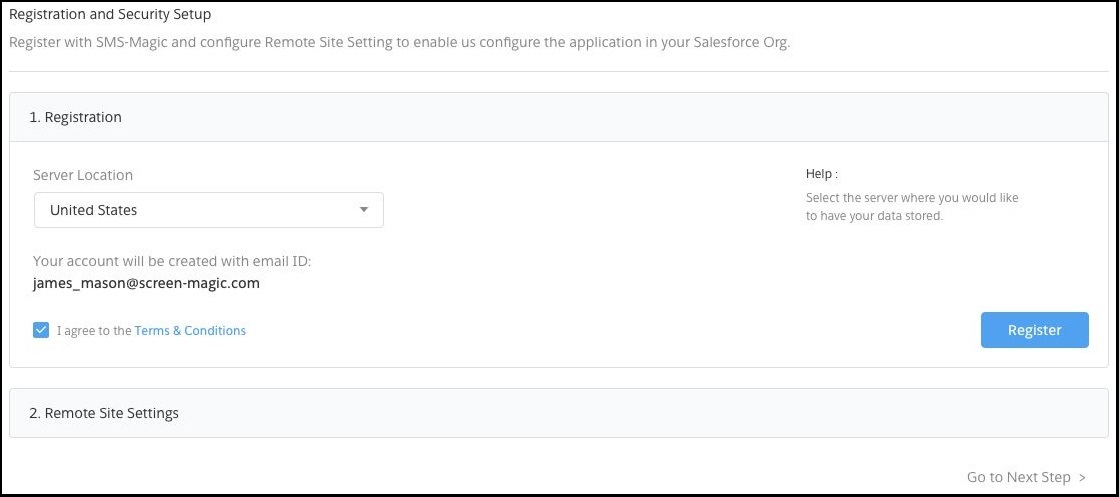
- Select the Converse Settings tab.
- On the Registration & Remote Site Setting page select the server location from the drop-down menu.
- Select I agree to the Terms & Conditions.
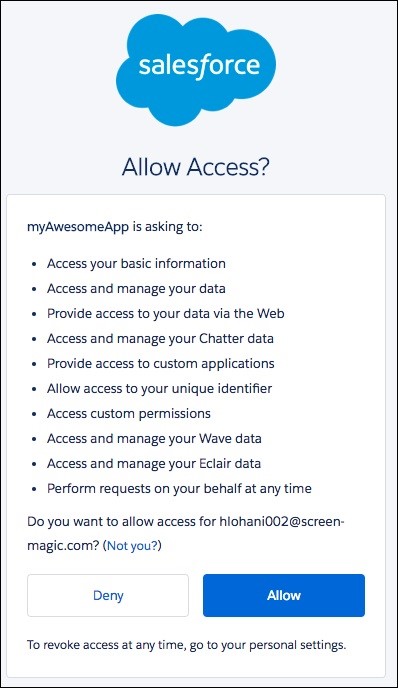
- Click Register. The Salesforce Allow Access? pop-up appears providing further configuration details.
- Click Allow. The Account Configuration Confirmation pop-up appears.
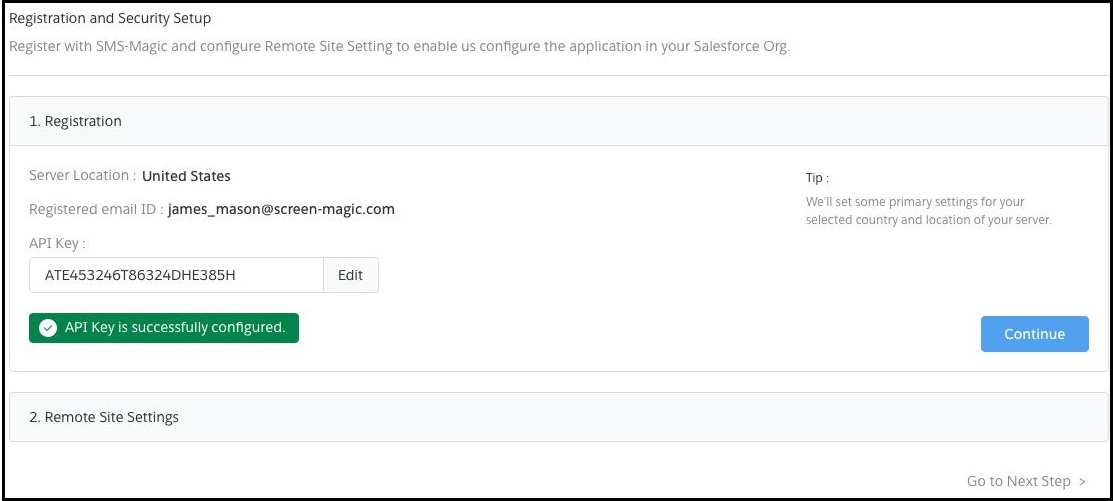
- Click Go To Salesforce. The Registration & Remote Site Setting page appears.
- The Registration & Remote Site Setting page displays the API Key assigned to the account.


Setup Remote Site
- Log in to Salesforce and access SMS-Magic Converse.
- Select the Converse Settings tab.
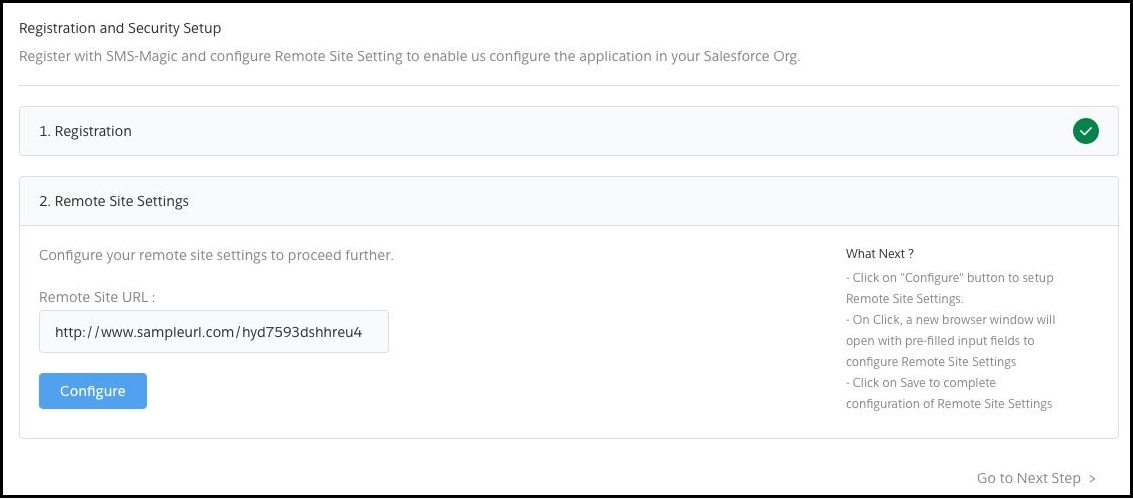
- On the Registration & Remote Site Setting page select Remote Site Settings.
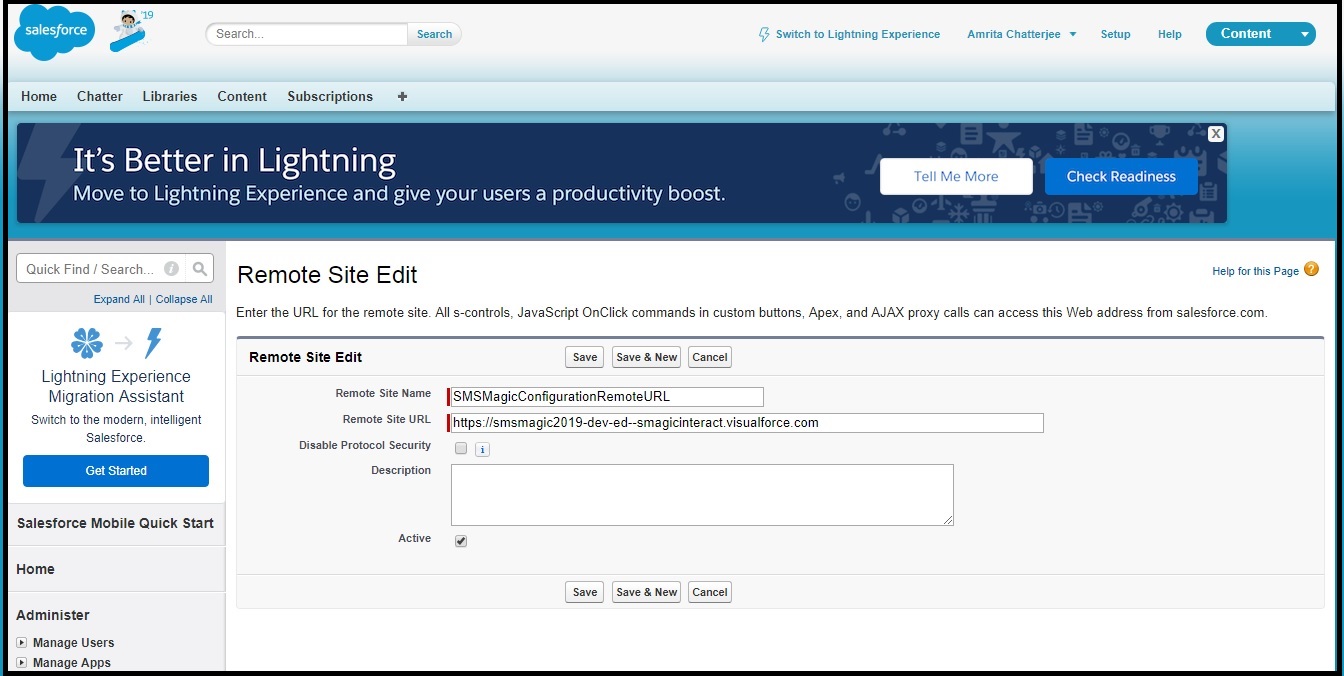
- Click Configure. A new browser window opens displaying pre-filled configuration details.
- Click Save.


0 Comments