Create Content Type
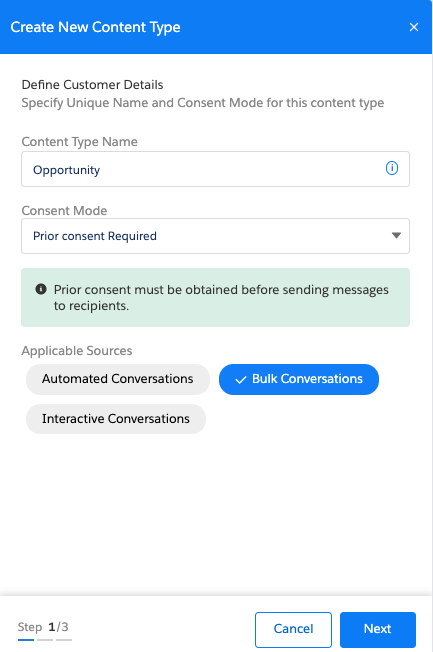
- Under Consent for Specific Content , click Create New. The Create New Content-Type pop-up window appears.

- Enter the customer details to create a new content type.
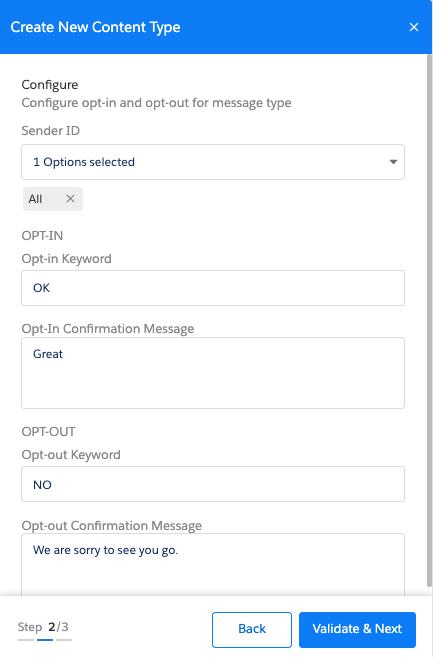
Refer to the table below for more details on individual fields. - Click Next. The Configure section appears to help you add the Sender ID and Keyword configurations for the new content type.
Refer to the table below for more details on individual fields.

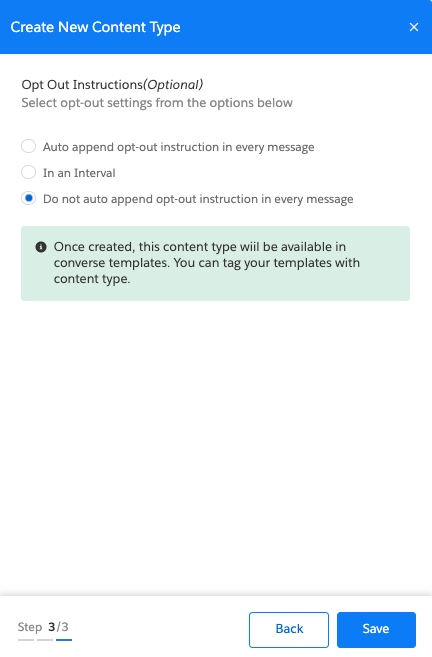
- Click Validate and Next. The Opt-out Instructions section appears.

- Enter details, as required, to add an opt-out instruction to your message.
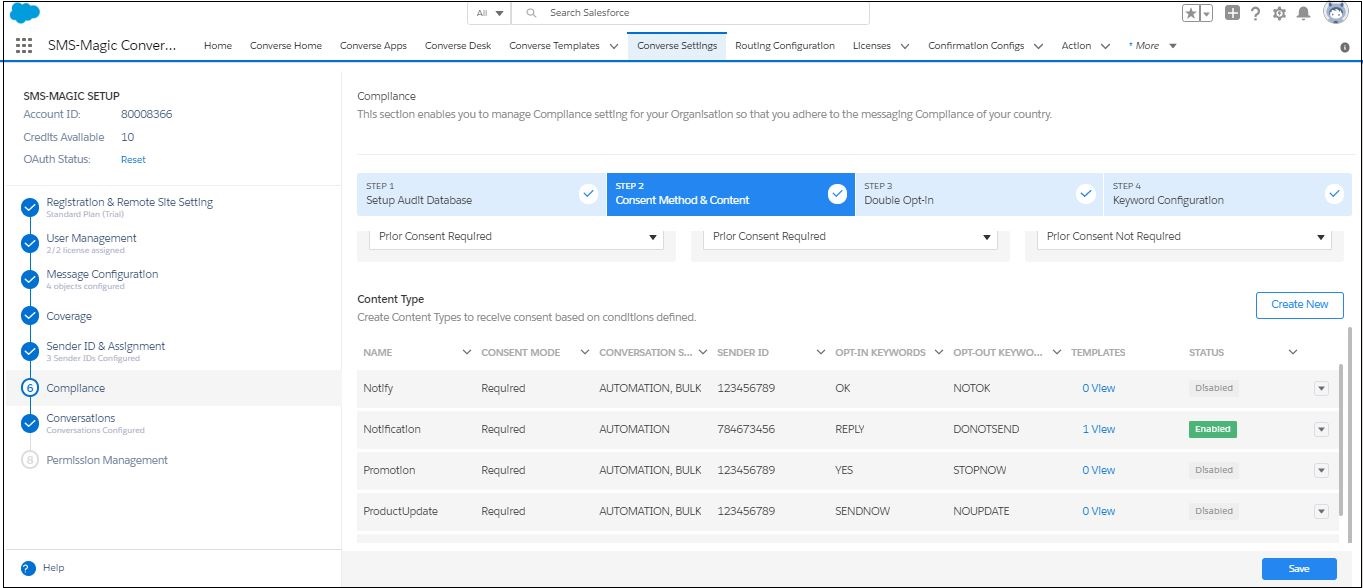
Refer to the table for more details on individual fields. - Click Save. The new message type appears on the Content-Type table.

|
Field |
Description |
|---|---|
|
Define Customer Details |
|
|
Content Type Name |
|
|
Consent Mode |
In the drop-down list select the relevant consent mode for the new content type. |
|
Applicable Sources |
Select the message source. The available options are:
|
|
Configure |
|
|
Sender ID |
In the drop-down list, select the Sender ID that will be associated with this Content-Type. Consent is created only if you receive an incoming request for this content-type using this Sender ID. |
|
Opt-In keyword |
Type the specific Opt-in Keywords that you want to associate with this content type. |
|
Opt-In Confirmation Message |
Type the message that will be sent to customers in response to the Opt-in request. |
|
Opt-out Keyword |
Type the specific Opt-out Keywords that you want to associate with this content type. |
|
Opt-Out Confirmation Message |
Type the message that will be sent to customers on receiving the Opt-out request. |
|
Opt-Out Instructions (Optional) |
|
|
Auto append opt-out Instruction in every message |
Select the option if you want to add an opt-out instruction to every message that is sent out. |
|
In an Interval |
Select the number of days after which the opt-out instruction will be appended to the content-type message being sent out. |
|
Select an Interval |
In the drop-down list select the number of days after which you want to append the opt-out instruction with the content-type message. |
|
Do not Auto-append opt-out instructions in every message |
Select this option if you do not want to want to append an opt-out instruction to every content-type message that is sent out. |
|
Opt-out Message |
Type the message you want to append as an opt-out instruction. This field appears only if you select the Auto append opt-out Instruction in every message option.
|

0 Comments